



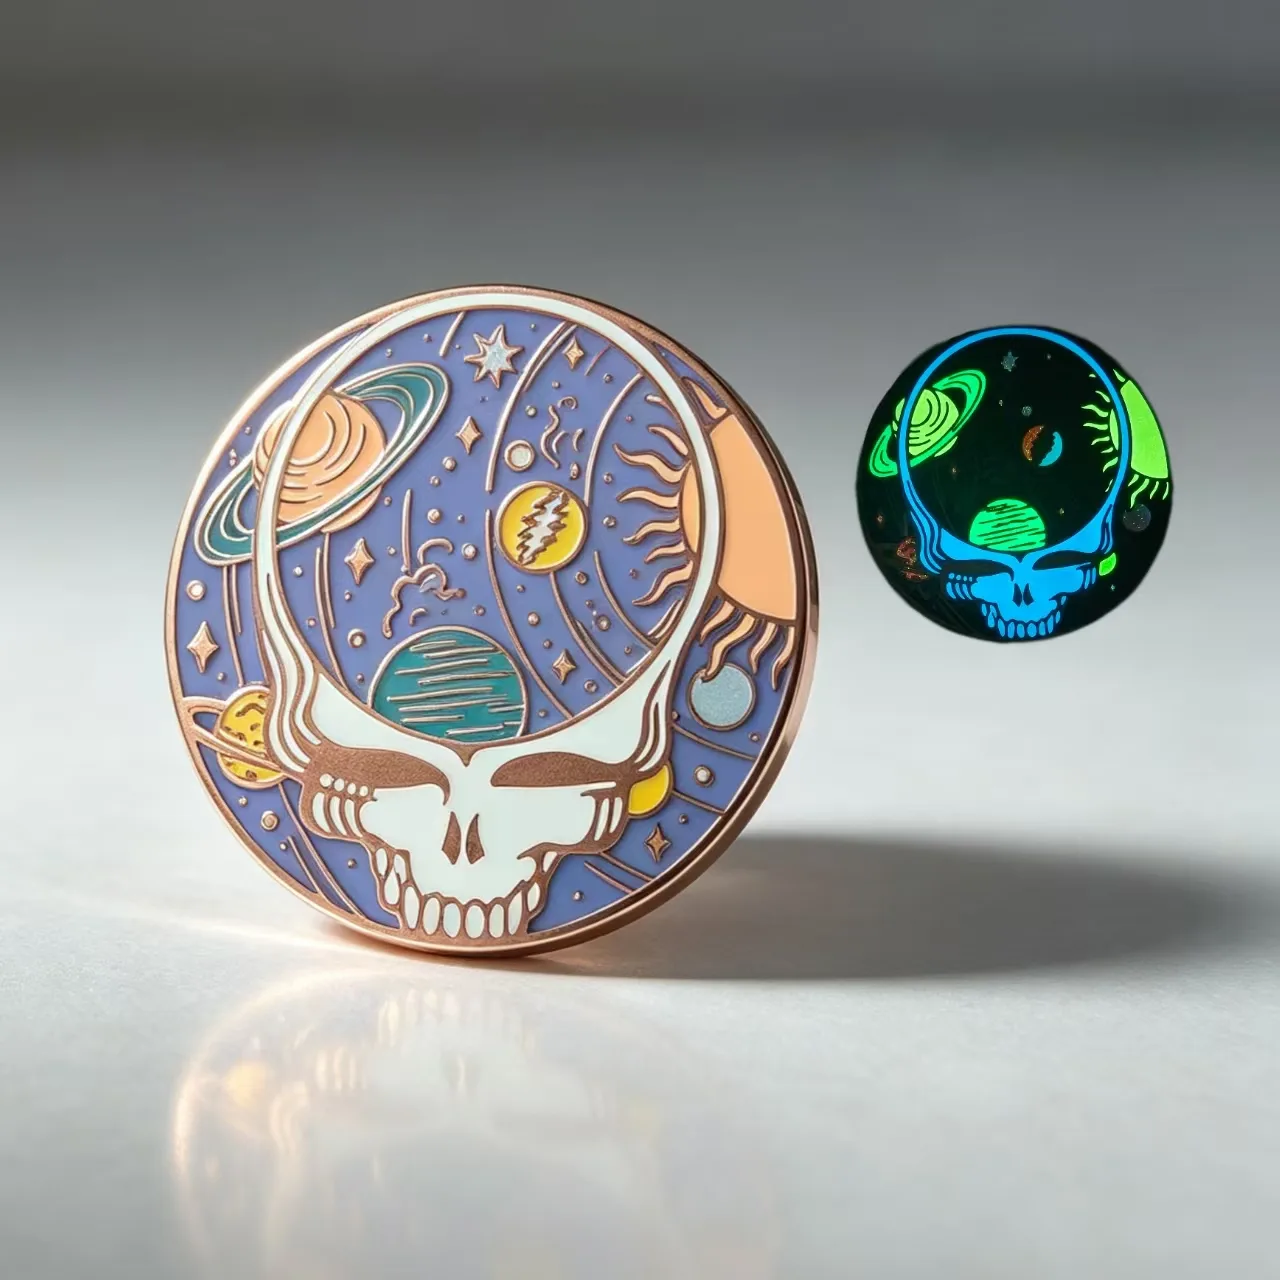
Glow in the dark enamel pins need two design reviews: one in ordinary light and another after the glow material has been exposed to light. A badge that looks clear on a screen may lose its message in a dark room, while an impressive glow photograph may say little about how the pin looks during the day.
For Halloween merchandise, evening events or a themed collectible series, the useful question is which part of the artwork should glow and why. Treat the effect as a design feature with an approval process, rather than expecting every color and tiny detail to behave alike.
Give the glow one clear job
Choose a focal element: a moon, lettering, a border or the eyes of a character. Large, readable areas are easier to evaluate than many scattered details. Keep the brand name or essential message legible in normal light so the product does not depend on a darkened environment to make sense.
For example, a hypothetical night-walk pin could use a glow moon above a conventional enamel landscape. The landscape identifies the event during the day; the moon adds the evening effect. This is a design scenario, not a claim about a particular production sample.
Ask what the proposed material actually does
Ask the supplier to identify the glow material, its normal-light appearance and the colors available for the selected process. Do not infer a finished glow color from an ordinary Pantone reference. The visible daylight shade and the low-light effect are separate approval questions.
Request an explanation of the light exposure conditions used in any sample demonstration. Exposure source, exposure time, elapsed time before viewing and camera settings can all affect what you see in a comparison. A bright promotional image is not a measured promise that every pin will look the same in every room.
Prepare a two-view artwork proof
Include a normal-light view with metal outlines and color areas labeled. Add a second schematic view marking only the areas intended to glow. Label that view as an illustration, because a digital mockup cannot establish the physical brightness or persistence of the finish.
Separate the glow instructions from other effects. If the design also uses glitter, transparent enamel or printed detail, ask whether those processes can be combined as drawn. A supplier may need to simplify small areas or adjust boundaries before producing a physical sample.
Compare samples under the same conditions
- Place the candidate samples together under the agreed light source.
- Expose them for the same agreed period.
- Move them to the same viewing environment.
- Compare them at the same elapsed intervals.
- Record the setup and the observations alongside the sample revision.
Choose review intervals that match the intended event rather than inventing a universal brightness target. If a measured specification is necessary, arrange an appropriate test and document the method. For a souvenir program, a consistent side-by-side approval may be enough to make an informed appearance decision.
Do not compare a phone photograph taken immediately after exposure with another taken much later. Automatic camera processing can make the difference look larger or smaller than it appears to the eye. Keep both photographs and written observations, and use the physical approved sample as the reference.
Balance the effect with the normal-light design
| Design choice | Useful review |
|---|---|
| Large glow area | Check whether its daylight color fits the artwork |
| Small glow lettering | Check physical legibility at final pin size |
| Multiple special effects | Confirm process compatibility and sample each combination |
| Dark background | Compare contrast in ordinary light as well as darkness |
Print the proof at actual size before approving it. A line that looks bold at a large zoom level may become visually insignificant on a small badge. If glow is central to the product story, reducing secondary detail can make the main idea easier to recognize.
Build the effect into your ordering schedule
Include time for sample review and possible revision. An event date is not the same as a factory completion date: packaging, dispatch, transit and local distribution still have to happen. Ask for a schedule based on the selected combination of processes rather than a general rush headline.
For a collection with several designs, approve each materially different layout. One approved moon-shaped pin does not automatically approve tiny glowing lettering on a second design. Keep revision names aligned across proofs, samples and purchase documents.
Describe the product accurately when selling it
Show both normal-light and low-light views, and explain that the appearance depends on prior light exposure and viewing conditions. Avoid unverified statements about hours of glow or guaranteed brightness. Use wording supported by the sample and any testing arranged for the actual order.
Start with the custom pin options and prepare your design using the artwork proof checklist. A clear two-view brief helps the factory quote the effect and gives your team a practical basis for approval.


